


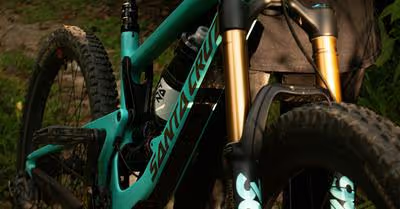
Key Takeaways
- Regular maintenance ensures a safer and smoother ride.
- Simple habits can significantly extend a bike's lifespan.
- Basic tools and a little knowledge go a long way.
Keeping your bike in prime condition isn't just smart; it’s a necessity for any cyclist.
Ever noticed that the smoothest rides come from a well-tuned bike?
That's no coincidence.
Maintaining your bike not only ensures a safer ride but also prolongs the life of your trusty two-wheeler.
A few simple habits such as cleaning, lubrication, and timely checks can go miles in keeping you pedaling without a hitch.
Remember how you felt when you first rode your bike?
It was like it responded to your every move with precision.
That's the feeling of a well-maintained ride.
I promise, it’s not rocket science, and I’m here to guide you through it.
With some basic tools and a bit of know-how, you’ll keep that new-bike feeling lasting longer than you thought possible.
Regular Cleaning
Hey there, did you know that keeping your ride spick and span is like giving your bike a hug?
It might sound cheesy, but regular cleaning is truly a love language for your two-wheeled buddy.
Let's dive into keeping your bike in tiptop shape with some elbow grease and a bit of care.
First things first:
- Grab some gentle soap, water, and a soft-bristled brush. Your bike’s finish will thank you for not using harsh chemicals.
- Tackle the frame: Use soapy water and give it a gentle scrub. Rinse it off, and she’ll shine like the sun after a storm.
- Show love to the chain: It’s the lifeline of your bike's movement! Get in there with your brush and make sure all that sneaky grime says goodbye.
- Don't forget the gears and other components; they deserve attention too.
Pro Tips:
- Always do a spot test with your soap to make sure it’s frame-friendly.
- Dry off your bike to avoid rust; think of it as tucking it in after a bath.
- Be careful with the water pressure—if it’s too strong, you might push dirt into areas that are hard to clean.
Remember, a happy bike is a clean bike.
Regular washes prevent build-up that can wear down parts over time.
You wouldn't skip a shower for a week, right?
Your bike feels the same way about cleanliness!
Keep it up, and you'll both roll smoother and happier on your next adventure.
No need to overdo it; once a week or after a dirty ride should do the trick.
Happy cleaning!
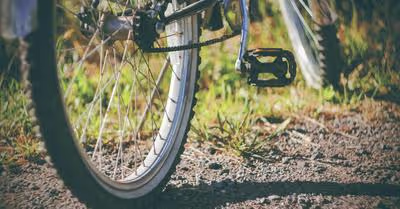
Lubricate the Chain
Hey there, savvy cyclist!
Ever wondered why your bike rides aren't as smooth as they used to be?
It might just be your chain crying out for a little TLC!
Let's give that chain the pampering it deserves and keep you rolling without a hitch.
First things first, grab a quality bicycle-specific lubricant.
Your chain is no place to skimp—after all, a happy chain equals a happy ride.
Now, with your bike stable, let's get those pedals moving backward and apply the lubricant sparingly to each link.
Remember, we're going for a light coat here, not dunking your chain into an oil bath!
Once you've treated every link to some lube love, give it a moment to penetrate the nooks and crannies.
Then—and this is key—take a clean, dry rag and gently wipe away the excess.
You might ask, "Why wipe off the good stuff?" Here's the deal: any extra lube just turns into a dirt magnet, and we don't want that.
- Inspect the chain for wear, rust, or damage.
- Clean using a degreaser and a brush for the best results.
- Apply the lubricant evenly, rotating the pedals backward.
- Wipe off excess lube to avoid attracting dirt.
Hitting the sweet spot between lubricated and clean can be a bit of a balancing act, but you'll know you've got it right when your chain hums along silently, free from the gunk that used to slow you down.
Remember, regular maintenance is the secret sauce to a long-lasting bike chain.
Aim to lube your chain every 100 to 200 miles, depending on your riding terrain and conditions.
Keeping your bike chain well-oiled not only makes your rides smoother but also extends the life of your drivetrain—now that's what we call a win-win!
Happy pedaling, and here's to every link in your chain working in perfect harmony! 😊🚴
Check Tire Pressure
Hey, you know what's a total drag?
Riding your bike with squishy tires—it's like wearing shoes two sizes too big!
Not only does it sap your energy, but it’s also a one-way ticket to Flat Tire-ville.
So, how about we make sure those tires are pumped up just right?
First, let's find your tire's happy place, measured in pounds per square inch (PSI).
The magic number is usually written on the sidewall of your tire.
Got it?
Great!
Now, here's a nifty trick: press a pen cap into the tire—if it sinks just a wee bit, you're golden.
If it plunges into the abyss, it's time to pump it up!
Of course, for top-notch precision, always use a trusty pressure gauge.
It's like having a mini superhero for your bike.
Remember, dialing in the perfect PSI ensures a smoother ride, better grip, and keeps those pesky punctures at bay.
Here’s a quick rundown for checking your tire's air pressure:
- Locate the recommended PSI on the tire sidewall.
- Use a pressure gauge for an accurate reading.
- Gently press a pen cap to estimate pressure—a shallow indent suggests proper inflation.
- Adjust the pressure if needed, inflating until you hit the sweet spot.
And there you have it!
Keep those tires in check, and you're set for an epic ride every time.
Just think of the breeze, the speed, and hey, you're being eco-friendly too!
Keep rolling, my friend, and let's steer clear of those flat-tire days.
Inspect Brakes
Hey there, fellow cyclist!
Have you checked your brakes lately?
Strong brakes are a must for a safe ride, so let's make sure yours are in tip-top shape.
Here's how you can keep your stopping power at its best:
- Examine the Pads: Take a good look at your brake pads. If they're looking thin or worn out, it's time to swap them out. Remember, brake pads are your best pals when it comes to stopping smoothly.
- Check the Wear Indicator: Many brake pads have wear indicators—a small notch or line that tells you when it's time for a change. Can't find the indicator anymore? Yep, that's your cue for replacement.
- Alignment Matters: Your pads should meet the wheel rim or brake disc squarely. If they don't, you'll get uneven wear or diminished braking power—something we definitely don't want!
- Adjust the Tension: Your brake levers shouldn't feel too soft or too stiff. If they hit the handlebar or feel too loose, it's time to tighten things up. A well-tuned brake lever can mean the difference between a close call and a collision.
- Squeeze Test: Gently squeeze your brake levers. The action should be smooth, and the pads should contact the rim/disc simultaneously. If it's all wonky, you've got some adjusting to do.
Keep an eye on these brake basics, and rest assured that when you need to stop on a dime, your trusty bike will be there for you.
Ride on, and be safe out there!
Adjust Gears
Have you ever felt a hiccup when changing gears on your beloved bike?
It's like it's begging you for a bit of TLC!
Let's ensure that your ride is as smooth as a buttered biscuit.
Step 1: Check your derailleur.
This little gadget steers your chain where to go.
If it's whispering sweet nothings to your bike frame (AKA, it's out of whack), you might need to adjust its alignment using the fixing clamp.
Secure it properly to avoid wonky shifts.
Step 2: Peek at the chain's position.
When your chain hangs out with the largest sprocket in the back, there should be a tiny gap—around 1mm—between it and the inner cage plate of the derailleur.
No room for rubbing here!
If you hear some, it's time to fuss with the low-limit screw until they're no longer buddies.
Step 3: It's all about the tension, baby!
Your gear cables need the right amount of snugness.
If shifting feels as sluggish as a Monday morning, give that cable a gentle tug to tighten things up.
But remember, it's a fine line—too tight and you'll be in a whole new world of gear trouble.
Maintenance Pro Tip: Keep your gears gleaming with regular cleaning and apply a dash of lubricant for an effortlessly chic performance.
Think of it as conditioner for your bike's hair.
Shiny, happy gears mean shiny, happy rides!
Finally, timing is everything: shift those gears like a pro by easing up on the pedals.
You've got this!
With these adjustments, your bike will hum along in harmony.
Ready to nab that Tour de Neighborhood title?
Check Bolts and Screws
Hey, friend!
Have you given your bike's bolts and screws a bit of attention recently?
They're the unsung heroes keeping everything together, so here's the lowdown on how to keep them snug and secure.
Step 1: 🧐 Grab your trusty torque wrench.
Why?
Because feeling isn't as reliable as a wrench's click when reaching that perfect tightness.
Trust me, your bike's performance hangs on the balance!
Step 2: 🧰 Look over every bolt and screw.
Start from the handlebars, move along to the saddle, and don't forget those on the wheels.
It's like a treasure hunt for potential weak spots!
Tip: Tighten in a sequence – it ensures even pressure distribution, especially on larger parts like the stem or seat clamp.
Here's a mini checklist:
- Handlebar clamps
- Stem bolts
- Seatpost clamp
- Brake calipers
- Derailleur mounts
- Bottle cage bolts
Be mindful! 🤓 Over-tightening can be as problematic as a loose bolt.
If you're squeezing that wrench with Hercules strength, take it down a notch.
Quick Fact: A periodic inspection can save you from unexpected creaks and wobbles during a ride.
Have you ever seen a cyclist stopped by the roadside, looking puzzled as they hold a detached bike part?
Yeah, that's what we're aiming to avoid.
Remember, if something feels off, or you notice any signs of wear, it's probably time for a professional check-up.
After all, it’s a small chore for bike longevity.
Keep rolling smoothly and safely! 🚴♂️💨
True the Wheels
Ever felt like your ride was bumpier than usual?
It might just be that your wheels need a true.
What is wheel truing, you ask?
It's straightening your wheels to keep your ride smooth and your bike looking sharp.
But how do you keep your wheels in line?
Let's break it down!
First up, give your wheels a spin.
Are they wobbling?
A little side-to-side action could mean your spokes are unevenly tensioned.
Fear not, because this is where your trusty spoke wrench comes into play.
Find the culprits—those loose or overly tight spokes—and give them a gentle twist.
Just a quarter turn at a time should do the trick.
For those of you who don’t have a truing stand, you can still get by.
Use cable ties on each side of the fork or frame, snug against the rim, as makeshift indicators.
As the wheel spins, watch for the rim to move away from the tie; that's your sign to get tightening or loosening.
And remember, the goal here isn’t Hulk-level strength.
You’re aiming for even tension for a wheel that rolls true.
Not feeling confident?
It’s totally okay to rope in a professional.
A yearly check-up with a bike mechanic can keep those wheels true and you cruising without a care.
Your bike will thank you—smooth rides ahead!
So, there you have it.
Keep those wheels rolling straight, and you're on track for a top-notch biking experience.
Now, go enjoy the ride!
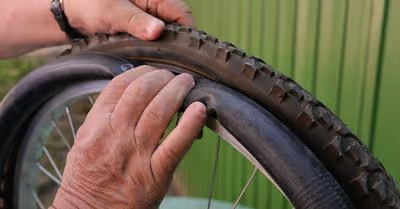
Inspect and Replace Worn Parts
Got a minute?
Let's talk about keeping your trusty bike in tip-top shape!
You check your phone regularly, right?
So why not show your bike the same love?
It's a good habit to inspect your bike's parts for signs of wear.
Keep an eye out for these usual suspects:
- Chain: It's like the spine of your bike! Look for any stiff links or rust.
- Cassette and gear cogs: These teeth should be sharp, not worn down to stubs.
- Tires: Cracks or worn treads? Time for new rubber!
- Brake pads: These should never be thinner than the width of a dime.
Noticed something off?
Well, don't wait around – worn parts can turn a small issue into a big problem faster than you can say "flat tire".
And frankly, who wants to be stranded with a bike that's seen better days?
Replacing parts can be like solving a puzzle.
Fun, right?
If you're not sure about what to get, just swing by your local bike shop.
They're like the bike whisperers, always ready to help.
Here's a tip: track your mileage.
Certain components have an "expiration date" based on how far you've pedaled.
For instance, chains usually need a swap every 2,000 miles or so.
Keeping a little log can save you from guessing when it’s time for a change.
In short, regularly replacing worn bits will keep your rides smooth and your bike happy.
And a happy bike means happy you!
So, keep up with the inspections and enjoy every pedal without any hiccups!
Check the Headset and Bottom Bracket
Ever wondered why your ride feels wobbly or your steering seems a bit off?
Could be your headset or bottom bracket calling out for a bit of TLC!
Let's make sure they’re in top-notch shape, shall we?
Remember, your headset is the key to smooth steering.
It's the rotating interface between your bike's fork and frame.
If there’s a knocking sound or a feeling of play when you wiggle the handlebars, it's time for an adjustment.
Here’s how to check your headset:
- Hold the front brake and rock the bike back and forth. Any movement? That's a no-go!
- Also, give the handlebars a twist. They should turn freely, with no roughness or resistance.
Moving on to your bottom bracket, this is what lets your legs push those pedals around without any hitches.
A cranky bottom bracket can feel like it's sapping your power, and nobody wants that!
To check your bottom bracket:
- Hold onto one of the crank arms and try to wiggle it side to side. Any play here? Not ideal!
- Spin the crank and watch for smooth movement.
Remember to lubricate and adjust both components regularly.
A gritty bearing or a loose component not only feels bad but also wears out faster.
While instructions for adjustments might vary, the principle remains—tight, but not too tight, lubricated, but not dripping.
Keeping these components happy means smoother rides and less wear and tear.
It's like giving your bike a hug from the inside!
Now, go out and enjoy that silky-smooth ride you've just dialed in!
Protect Against the Elements
Ever thought about how your bike feels when it's left out in the rain?
Imagine standing in a shower all night—doesn't sound too pleasant, does it?
Well, that's exactly how your trusty two-wheeler feels!
Here's a little secret to keep your bike smiling through any weather:
- Find a Happy Home: Keep your bike indoors or under a shelter. Think of it as its cozy little den where it's safe from rain, hail, or any of Mother Nature's mood swings.
- The Mighty Bike Cover: If outside storage is your only option, no sweat! A bike cover will be your bike's new best friend. It's like a snug blanket that wards off water and dirt.
- Shine, Baby, Shine!: A protective wax or polish on your bike's frame isn't just for show—it's a shield against the nastiness of rust and corrosion. And of course, it makes your bike gleam in the sun like a superhero's armor!
Remember, water is sneaky—it'll find its way into every nook and cranny.
By giving your bike a dry place to rest and using a cover when it's outside, you're taking a huge step in extending its life.
So grab that polish, cover up, and you're all set to give those elements a run for their money!
And remember, a happy bike equals a happy ride.
Now go out there and show off your bike's longevity superpowers!


.avif)
