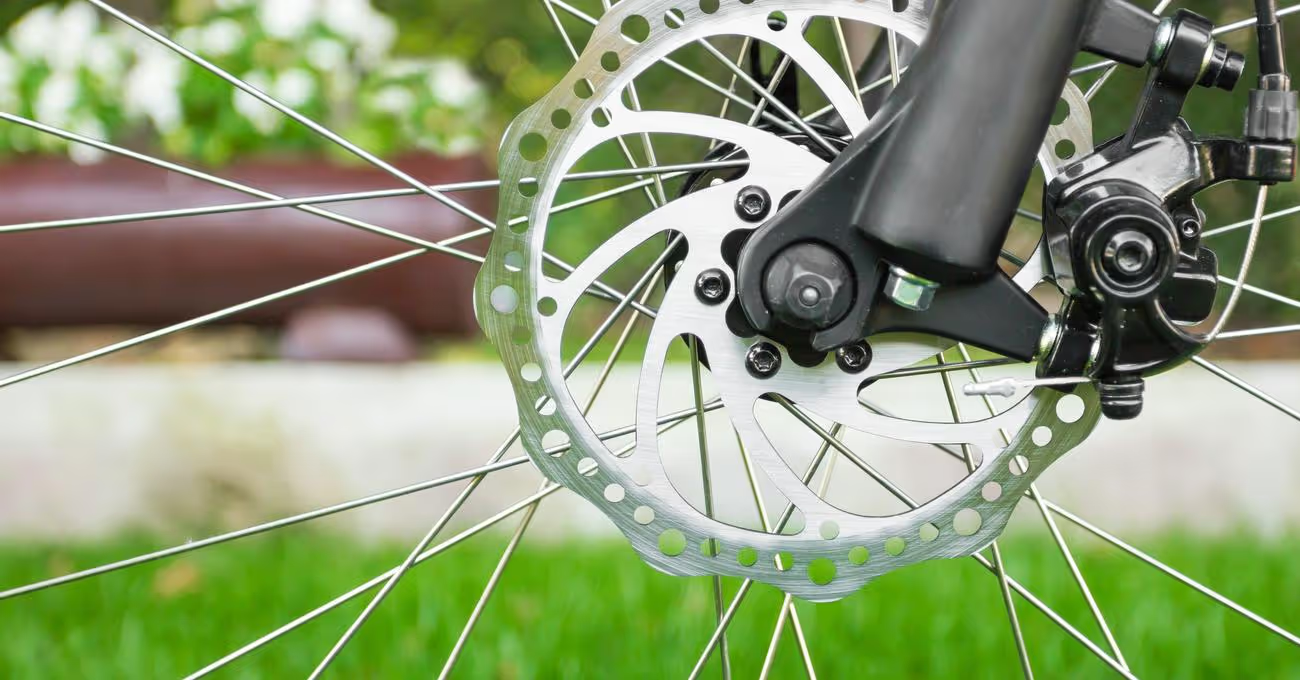
When it comes to cleaning bike disc brakes, you may be probably asking yourself; can you use brake cleaner on bike disc brakes? The guide has the answers.
Can you clean bike disc brakes using brake cleaner? Can brake cleaner damage bike disc brakes?
It’s not recommended to use brake cleaner on bike disc brakes. Also, using brake cleaner on bike disc brakes is not necessary. Using brake cleaner on bike disc brakes can lead to contamination. So, it’s highly advisable to avoid using it and instead opt for mild soap and water.
If you are looking to clean your bike disc brakes, you may be wondering whether you can use brake cleaner. Well, this article has all the information you need on how to clean bike disc brakes as well as whether you can use brake cleaner on disc brakes.
We are committed to providing our readers with actionable, helpful, accurate and up-to-date information. To this end, we have assembled a best-in-class editorial team, bringing together professionals from all the various niches that we cover in our articles. So, you can be assured that all the information contained in our articles, guides, reviews and other pieces of content is credible.
Overview
With time, dirt, dust, grit and grime will get stuck in your bike’s brakes. And once this dirt, dust or grit gets stuck in there, it will begin grinding together and eventually reduce the efficiency and life of your disc brakes.
Therefore, if you want efficient and powerful stopping power, you need to ensure that there’s no dirt or grit stuck in the disc brakes. And, you can achieve this by cleaning the disc brakes regularly and properly.
Importance of Cleaning Disc Brakes
Cleaning your bike disc brakes will help to boost their stopping power while extending their lifespan. So, how can you tell when it’s time to clean the disc brakes? One of the easiest ways of telling when your disc brakes require cleaning is to listen to them whenever you apply brakes. If you notice some howling noise coming from the brakes, then it’s probably time to give them a clean.
Also, if you notice reduced braking power or braking performance and your brakes are almost new, then there’s a chance that there’s grit and dirt stuck in there. And these elements are probably the main cause of the reduced braking performance.
Even if you haven’t noticed any of the above symptoms, it’s still advisable to clean the disc brakes regularly. The frequency for cleaning the disc brakes will mainly depend on the riding conditions and the mileage.
If you usually ride in areas filled with dirt, sand, and mud or you are a long distance rider, then it will be highly advisable to clean the disc brakes at least weekly. But if you are a casual rider and you do most of your riding on paved, tarmac surfaces, then cleaning the brakes twice per month should be enough.
How to Clean Bike Disc Brakes
Without a doubt, it’s important to keep your bike disc brakes clean as much as possible. And while cleaning the disc brakes may appear like a complicated process, it’s not that hard. You just need the right supplies and steps, and you will get it done within a couple of minutes – even if you haven’t done it before. Here are the steps to follow when cleaning bike disc brakes.
Assemble the Needed Supplies
Like any other cleaning process, you will need a couple of supplies to clean bike disc brakes. In this case, you will need a bucket filled with water, latex or nitrile gloves, mild soap, brush or pieces of cloth.
Remove the Disc Brakes and Wheels
After you’ve gathered all the supplies that you need for the task, you should now proceed to the next step. To clean the disc brakes properly, you will first need to remove the brake pads as well as the disc itself.
To do so, you should first position your bike on a stand and then remove the wheel. After you’ve removed the wheel, you should then proceed to remove the brake pads. The method you will use will depend on the type of brake caliper present in your bike.
Check for Wear and Tear
Once you’ve removed the pads, calipers and rotors from both wheels, you should proceed to check for wear and tear. If any part has serious wear and tear or it’s looking seriously worn, it will be highly advisable to replace it. While inspecting the disc brake parts, you should be wearing a pair of nitrile or gloves. Wearing gloves will help to prevent oil contamination to the brakes.
Clean the Disc Brakes
If you’ve inspected the various disc brake parts and components and you are satisfied with their condition, you can now proceed to clean them. Here are the steps to follow for this process.
First, spray the brake pads and discs with the solution that you prepared earlier. Ensure you spray this cleaning solution on both sides of the rotors. You will then use a brush or cloth to remove any dirt, dust or grit on the parts. You should then finish off the cleaning process by wiping the parts with a piece of clean cloth.
Second, you should spray the same cleaner to the unions and calipers. Make sure you spray a generous amount, so that this cleaning solution can dissolve any dirt or grime that may be present in these parts.
After that spraying the union and calipers with the cleaning solution, you should then proceed to scrub with a cloth or brush, making sure you remove all the contaminants or elements present on these parts.
Third, having cleaned the union and calipers, it’s now time to proceed to the next components. And these are the levers. Whether your braking system is cable or hydraulic operated, it’s also important to clean the levers. Again, you will spray the cleaning solution to the levers generously and then scrub using cloth or brush.
Reassemble Everything
Once you’ve finished cleaning all the parts and components of your bike braking system, it’s now time to re-assemble everything. When re-assembling the brakes and wheels, it will be highly advisable to use this opportunity to lubricate all the moving components. You will have better access to the different moving parts when the wheels, pads and rotors have been removed.
After lubricating the moving parts, you should also conduct a final inspection on the brakes for the presence of any grit, sand or stones that you may have missed during the cleaning process. If you’ve lubricated all the moving parts and ensured there are no stones or grit stuck in the brakes, you can now reassemble everything.
If you notice your disc brakes squeaking after reassembly, there’s a high possibility that they have been contaminated during the disassembly or cleaning process. However, re-cleaning them following the steps we’ve outlined here should help to fix the problem.
Can You Use Brake Cleaner on Disc Brakes?
When choosing a cleaning solution for your disc brakes, some people may recommend that you use a brake cleaner. However, it’s highly advisable to stay away from brake cleaner when cleaning your bike disc brakes. As much as the brake cleaner may also help to remove the dirt, grit and other debris, it may also cause contamination to the disc brakes. Therefore, it’s best if you avoid using brake cleaner on disc brakes.
In Summary
Cleaning your bike disc brakes regularly will help to ensure they maintain reliable and top-notch stopping power. However, it’s important to ensure you clean the disc brakes properly, to prevent any damage or contamination. And, the steps we’ve shared in this guide should help you to get it done right, the first time.
















.avif)
